Aurora Chasing 101 with Vincent Ledvina
Don’t forget hand warmers, which your camera may need more than you do, says UND’s resident expert on shooting the Northern Lights

Editor’s note: The following story appeared in the Nov. 23 edition of the Dakota Student, and is reprinted here by permission.
By Claire Weltz
There are a lot of reasons people choose to attend UND. The school is renowned for its aviation program. Others are attracted to its top-caliber hockey team. For physics senior Vincent Ledvina, it was the opportunity to chase auroras.
“The northern lights were actually a factor when choosing to attend UND,” he said. “Grand Forks is one of the best places to see the northern lights in the United States. The aurora oval dips down to cover us [in Grand Forks]. The magnetic north pole isn’t the same as the geographical pole, and that helps us see them better.”
As an ex-STEM major, I can hold my own in discussions on physics, chemistry, mathematics, etc. However, talking with Vincent Ledvina felt casual. Ledvina is a senior studying physics here at UND. With his vast knowledge in physics/astronomy paired alongside hands-on experience in photography, he simplified complex topics while also elaborating on details that only an expert in astrophotography could provide. Without further ado, welcome to Aurora Chasing 101 with Vincent Ledvina.
Lesson 1: Basics of Magnetism
The planetary k-index (KP) measures global strength of a geomagnetic event, or, in simpler terms, the potential to see the northern lights on a given night. The KP Index is like the Richter Scale for earthquakes, in that it loosely follows a logarithmic scale. The next value is worth significantly more than the previous value.
To track the northern lights, Ledvina follows the National Oceanic and Atmospheric Administration (NOAA) webpage (https://www.swpc.noaa.gov/ ). The website gives the potential forecasts for three-hour increments in UTC, so students living in Grand Forks will need to convert to Central Time. To capture the northern lights, the KP index should be a four or five. A higher value is better, but those occurrences stem from unique circumstances such as a big explosion on the surface of the sun.
Like the weather forecast on your phone, the KP forecast is also semi-unreliable. Ledvina attributes some of this discrepancy to the “lack of satellites in space measuring aurora information.” He recommended viewing the KP values from the NOAA as an upper limit because “sometimes nothing happens.”
Not everyone has the scientific mind to comprehend such data. Ledvina has spent hours studying terminology and information to interpret the aurora forecasts. For beginners, Ledvina suggested following photography groups on Facebook that are dedicated to chasing the northern lights. “Instead of going to read the solar wind data and looking at the different values (density, speed, magnetic field strength) which is intimidating for 99% of people, checking online to see where and what photographers are posting is quick and easy.” He added that “auroras are a global thing. A photographer in northern Washington can see the same features that we see here.” This means that social media users from all over the country can help people spot auroras.
Lesson 2: Going Out
Here is Vincent Ledvina’s simplified packing list for a night chasing the auroras:
Phone OR Camera/Tripod
You can’t take a photo without a device. You’ll either need to bring your phone or a combination of a camera and tripod. Phones have software to stabilize photos, but a tripod is a necessity if shooting with a camera. If you forget a tripod, Ledvina said that he has previously used a rock and the hood of his car to keep his camera stable.
Extra Batteries or Portable Charger
It gets cold, and batteries will die quickly. You won’t want to have to drive back early, so bring backup.
Handwarmers
Ledvina packs these obviously to keep warm, but he has a secondary use for them too. “Sometimes I’ll rubber-band handwarmers to my camera,” he explained. It can prolong the life of the camera batteries and prevents the lens from fogging up.
Winter gear, hats, gloves
Every UND student knows it gets cold. Ledvina was clear that it’s frigid when he is out chasing the northern lights. “If you think it’s cold, subtract another 20 degrees for wind and standing still in a field.” Frostbite is avoidable, so wear layers and use common sense.
Where to go?
You’ve checked NOAA. The KP index is four, five, or even more. There are no clouds. You’re all packed. Where to now?
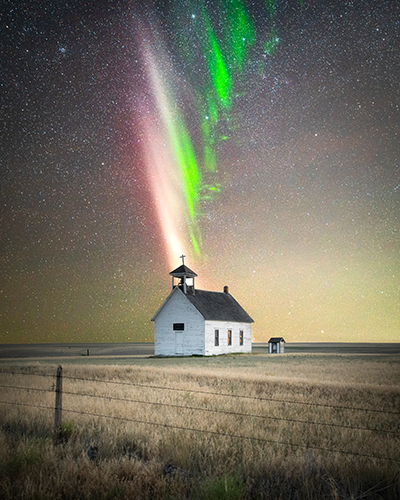
A common misconception about tracking the northern lights is that you need to go north for a better view. Ledvina dispelled this myth, explaining that we “are already far enough north. Going north another 50 miles won’t make a difference in the aurora oval.” North Dakota falls in this near perfect viewing area, so moving farther north makes a minimal difference as the latitude positioning is virtually the same.
Ledvina was gracious enough to share some areas where he takes photos. He doesn’t recommend going south or east as lights from I-29 can interfere, and it is difficult to cross over into Minnesota without going through towns. Towns equal light pollution which will hide the already elusive auroras.
That leaves north and west. For beginners, Ledvina recommends a quick trek west to Kellys Slough. “Kellys Slough is one of the most accessible places.” With an easy place to park, a viewing platform, lakes/ice for reflections, and being close to Grand Forks, he gives it a six out of ten to get photos of the northern lights. The accessibility, proximity, and variety for different photo compositions allows for a simple yet memorable excursion.
Another suggestion was north of the air force base. There are fewer trees than Kellys Slough which can obstruct your view. Ledvina gives this a seven out of ten since the surroundings are clearer and farther from Grand Forks’ light pollution.
The best spot Ledvina told us about is west toward Turtle River near Inkster. This is also the location of a UND-affiliated aurora livestream camera which can be found here. The livestream description explains that the “North Dakota Dual Aurora Cameras (NoDDAC) is an aurora camera stationed at the Martens Observatory in North Dakota. It is a collaborative project between the University of North Dakota, Aurorasaurus, and the LiveAuroraNetwork.” This location received a nine out of ten from Ledvina.
Lesson 3: Seeing the Northern Lights
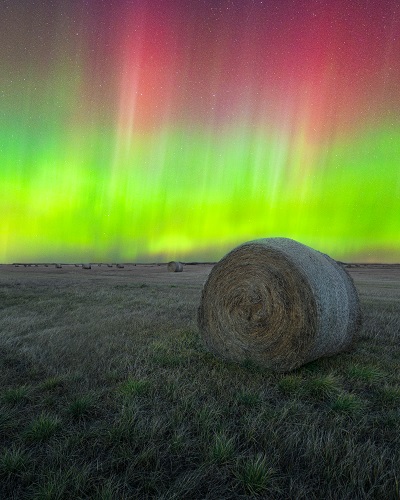
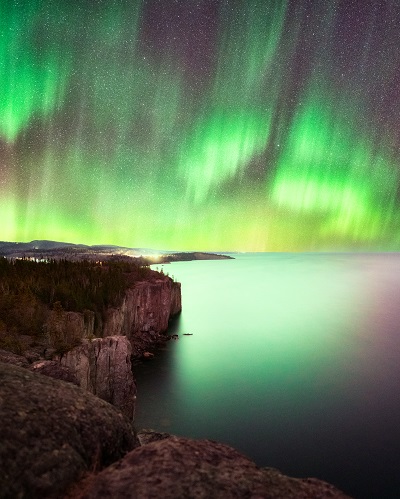
You probably won’t “see” the northern lights when you go out. Although they are able to be captured by camera, the impressive displays of shifting green usually aren’t visible to the naked eye due to the anatomy of our eyes.
In addition to his physics expertise, Ledvina provided an answer to this anatomy question. “The way our eyes work is that we have rods and cones. Cones are very color sensitive, but in low light, our rods take over, so we see in black and white.” If you see the auroras, it will likely be a haze of gray.
A photography friend of Ledvina gave him this tip: the full moon can assist in seeing the colors without the aid of a camera.
The moon isn’t always out, so Ledvina has another hack. “You can look into your phone flashlight. Look straight into it then quickly look away. The light will activate your cones so when you look at the aurora, you’ll see the greens for an instant.”
While on the topic of light, when going out, be aware of your car’s headlights. If driving past a group of people, don’t blind them with your brights. “Obviously, we don’t want any accidents or tripods getting mowed over, but safety comes first,” Ledvina assured us. “It’s a courtesy thing. You should also try to avoid walking in front of people who are photographing.” He knows how exciting it can be for people to see the northern lights for the first time, so he is forgiving of eager gawkers who wander into his photos.
Lesson 4: Getting the Shot
Now, for the moment you’ve been waiting for – how to get the photo.
On an iPhone, night mode should appear in the left corner of your screen which will prompt you to hold still for several seconds. Again, smartphones have technology to stabilize any movement, but we would not recommend chugging a coffee before heading out and getting the caffeine-induced hand shaking.
The process is a little more complicated for a DSLR camera. You’ll need to adjust based on three key components: shutter speed, aperture, and ISO. Shutter speed refers to how long the shutter is open. This setting will vary depending on how fast the aurora is moving in the sky.
To begin, Ledvina uses the unofficial 500 rule. “To get started, set your shutter speed to 500 divided by your focal length. You may need to decrease the value to 400 divided by your focal length or even 300.” He added that this method “will get you a photo without star trails.” The earth rotates, so the stars do too. In astrophotography, if the shutter speed is too long, the stars will appear longer or streaky in the sky. The result can look like a shooting star, but it’s all about personal preference.
Next is aperture. This part is easy to remember as Ledvina says to put it at maximum.
Lastly, you will need to consider your ISO. Unfortunately, there isn’t a rule of thumb for this setting. “Whatever makes the image look bright, don’t overexpose,” is Ledvina’s advice. For reference, his camera captures images best when at about 3200, ISO varies from camera to camera and night to night. Ledvina reassured us that, “You don’t need to understand everything but just enough to make adjustments.”
Bonus Lesson: Editing
To be clear, editing is optional. If you are happy with your image, that’s what counts. If you want to touch it up a bit to see more vibrant colors, Ledvina uses Lightroom Classic on desktop. He shoots RAW not JPEG, so it’s easier to export to a desktop. Lightroom Classic also has a wider variety of tools which Ledvina uses when editing photos he intends to sell as prints.
If interested in purchasing Lightroom Classic or other Adobe software such as Photoshop or Illustrator, UND has a student discount with Adobe for cheaper rates. However, the following tips can be utilized with free smartphone editing apps too.
Simple adjustments can be made to the shadows and contrast. Ledvina sometimes utilizes selective color adjustment when trying to see the reds and purples in auroras. A more advanced technique is to do a sky replacement. This method combines multiple photos. If you have a good foreground but the sky doesn’t inspire much awe, you can switch out the sky with another photo. This may require some layering and blending. When doing a sky replacement, Ledvina discloses this editing when posting and selling his work as not to mislead viewers.
If you’d like to see more of Vincent Ledvina’s work and follow his astrophotography adventures, you can find him on Instagram, Twitter, and Facebook!
About the author: Claire Weltz, a UND senior and a Communications major, is the Arts/Community and Sports Editor at the Dakota Student. She can be reached at claire.weltz@und.edu.